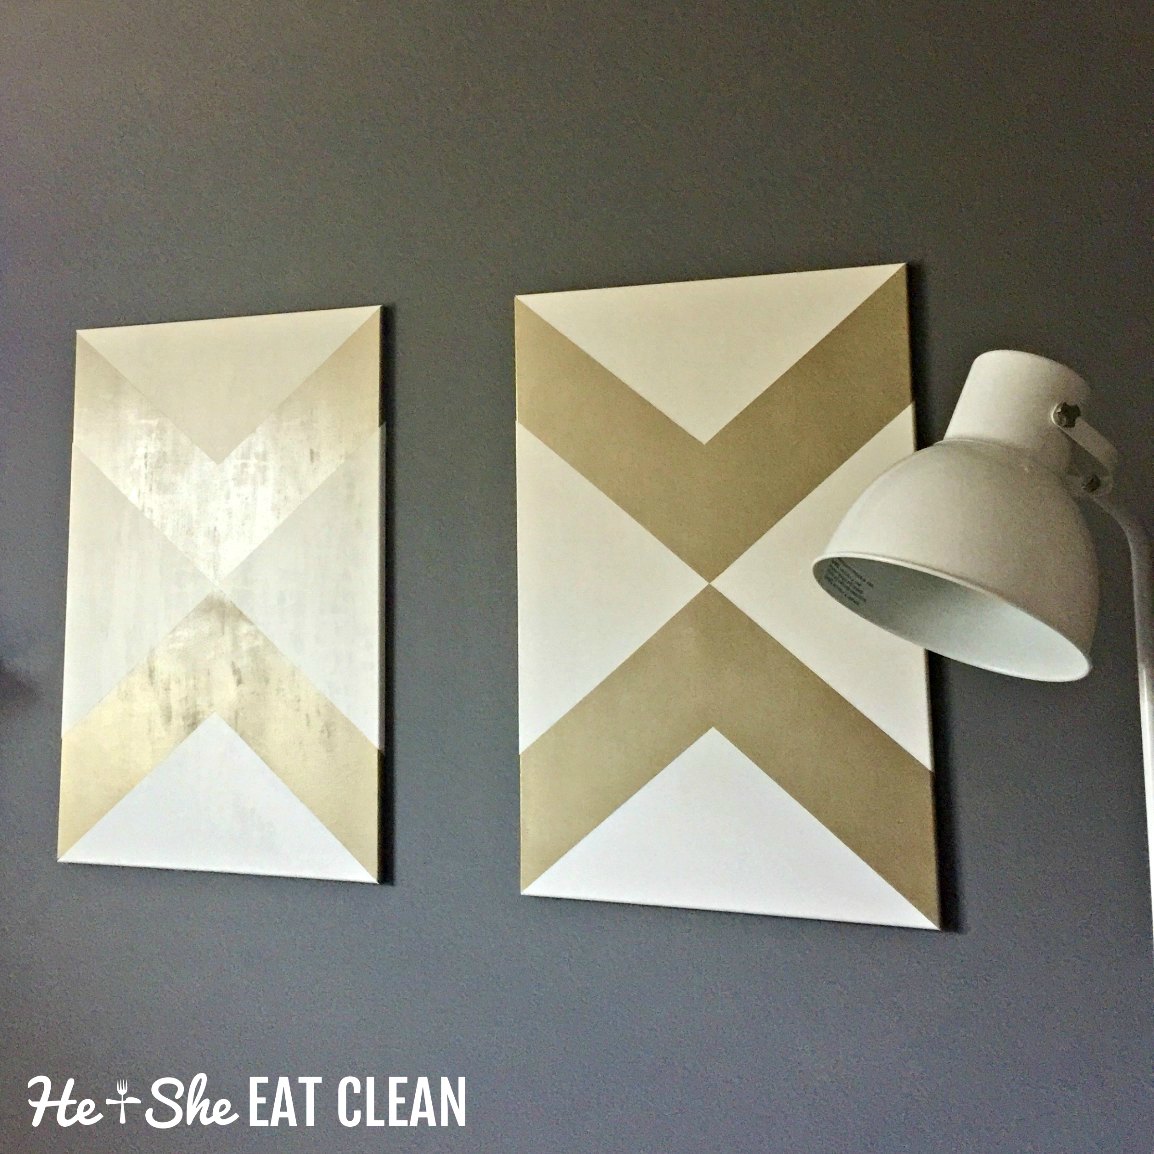
We had a blank wall in our small living room that we weren't quite sure what to do with. I didn't want the wall to be too busy since we already have a lot of artwork in this open area but the wall definitely needed something! I saw a few ideas on Pinterest that I liked and we decided to go with this arrow art since it fits in with our adventure/travel theme that has taken over our whole house. ;-) We gained inspiration from this design and this design. We basically just saw the pictures on Pinterest and got to work. A bonus is that the one on the left covers up the switch for the gas logs!
This was a very inexpensive way to fill the space and also gives us the satisfaction of saying "Yes, we made those!". The prep is the longest part but is also the most important. I would say set aside 4-6 hours for this project (if you are making two) just because of the drying time. You won't be working on them for straight 4-6 hours though.
RELATED: DIY Industrial Pipe Shelving
Supplies (this is what we used):
- Blank canvas (2 - 24" X 36") - $20 (we purchased while they were half off at Hobby Lobby)
- Color sample - $3
- Painters tape (we already had this)
- Two cans of spray paint - $14
- We used Rust-Oleum Spray Paint Metallic in Pure Gold and Satin Bronze. Below is an Amazon affiliate link to the Pure Gold. We purchased the Satin Bronze at Home Depot.
We spent under $40 to make two large pieces of art (we already had the painters tape). I think that's a great deal! We also have almost the whole sample paint left and a lot of the pure gold spray paint.
I made Scott write down the steps so I could share them with you. :)
DIY Canvas Arrow Art
1. Buy a blank canvas
- We purchased ours at Hobby Lobby while they were 50% off
- We used two 24" X 36" canvases
2. Paint the entire canvas the background color of your choosing
- We used a small paint sample container (8 fl oz) and had plenty of paint and still have a lot left over
- Ours is BEHR ULTRA eggshell enamel interior color sample in Almond Milk
3. Once the canvas is dry, determine how thick you want your arrows to be (the portion you will paint with spray paint). We decided on 8" thick arrows.
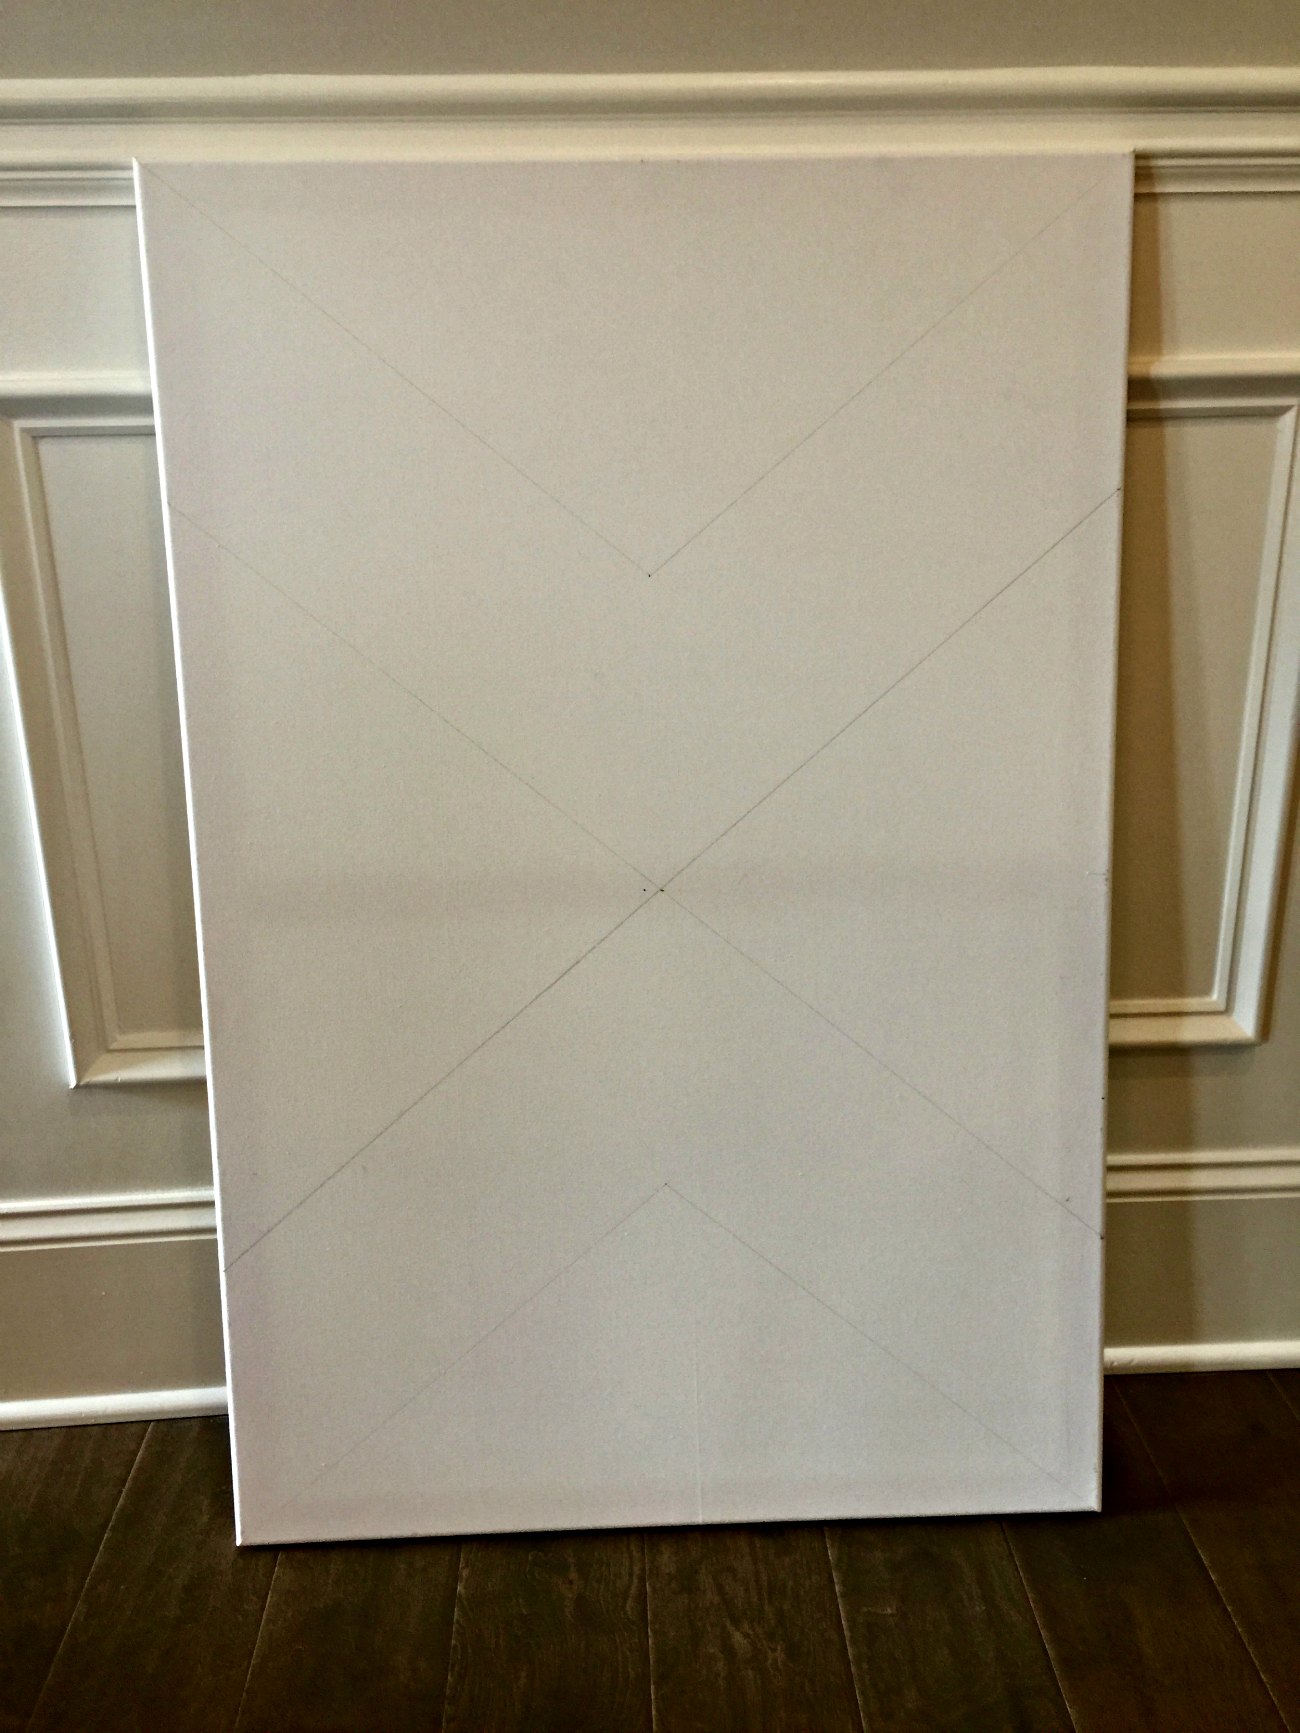
- Now that you know how thick you want your arrows, the first step before drawing out the arrow is to find the exact midpoint of the canvas and premark that intersection with a pencil (it probably helps to make a small X).
- Then, measure 8" vertically up and down from your midpoint and mark each with another X. This will mark the inner border of your arrows and you will need to make sure both x's are at the exact horizontal midpoint of the canvas, so measure from each edge to ensure your arrows will be parallel.
- You will then need to use a straight edge (we used a 36" level) to draw your arrows. Start from each corner and draw a straight line to the X's you marked in the previous step. Do not draw lines to the midpoint in this step...that is next.
- Now, you will need to draw the outer borders of your arrows. Measure 8" (or whatever width you decided on in step #1) from each corner and draw a straight line to the midpoint all the way across to the other side of the canvas. Measure the border's endpoint on the other side of the canvas to the corner which you've drawn your border to in order to make sure your width is consistent throughout.
- Repeat for outer border from other corners of the canvas.
4. Carefully tape along the lines and place newspaper underneath the tape to cover the section of the canvas that will not be painted with spray paint. The midpoints are tricky because they do not form perfect 90-degree angles, so you'll need to cut small pieces of tape (about 1/2" long) and place them along the midpoints of the arrows. We had to fold down the first piece of tape to the midpoint then place the second small piece of tape on top to make a perfect point. This step is tough, but take your time to get it right!
5. Now it's time to actually paint the arrows! We used mainly the metallic satin bronze but also used the pure gold just to give it some extra texture. You could just use one color if you prefer but we love the way the light hits it and shows off the pure gold.
5. Remove the tape while the paint is still drying
6. Once dry, hang your artwork and admire your hardwork. :)


![#ProgressIsPerfection [3 Simple Ideas to Reach Your Goals]](https://images.squarespace-cdn.com/content/v1/555c964fe4b07d15252a8927/1520969172984-7HDOHI6ZRM0PCZCZ7O67/progress-is-perfection-silk-he-and-she-eat-clean2.jpg)


