He & She Eat Clean | Healthy Recipes & Workout Plans

home updates

DIY Canvas Arrow Art

Whitney CarlsonComment
DIY Arrow Art

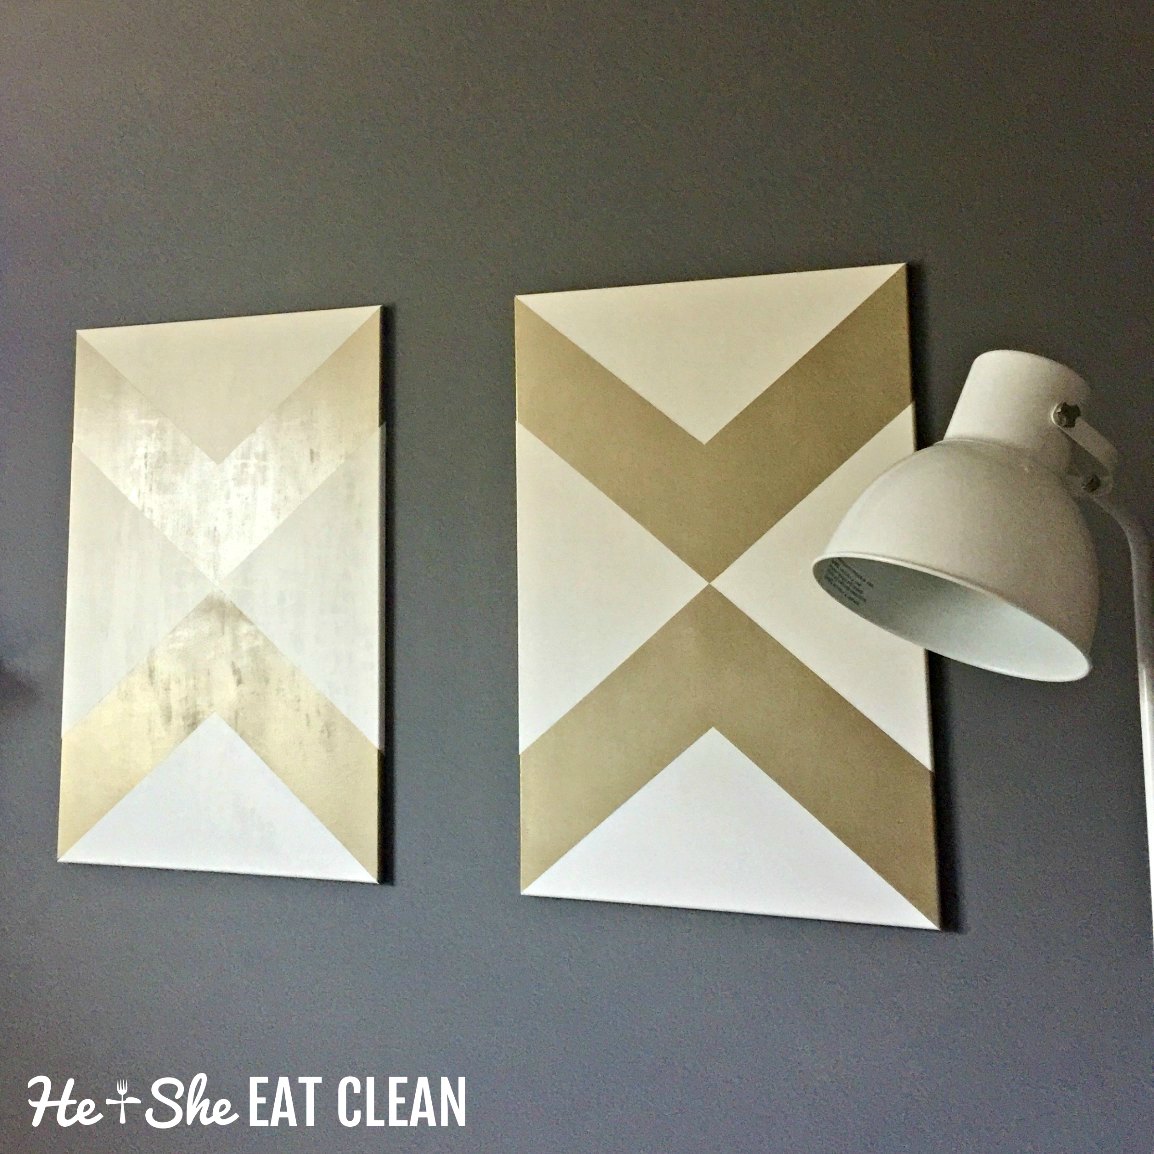
We had a blank wall in our small living room that we weren't quite sure what to do with. I didn't want the wall to be too busy since we already have a lot of artwork in this open area but the wall definitely needed something! I saw a few ideas on Pinterest that I liked and we decided to go with this arrow art since it fits in with our adventure/travel theme that has taken over our whole house. ;-) We gained inspiration from this design and this design. We basically just saw the pictures on Pinterest and got to work. A bonus is that the one on the left covers up the switch for the gas logs!

This was a very inexpensive way to fill the space and also gives us the satisfaction of saying "Yes, we made those!". The prep is the longest part but is also the most important. I would say set aside 4-6 hours for this project (if you are making two) just because of the drying time. You won't be working on them for straight 4-6 hours though.

RELATED: DIY Industrial Pipe Shelving

Supplies (this is what we used):

  • Blank canvas (2 - 24" X 36") - $20 (we purchased while they were half off at Hobby Lobby)
  • Color sample - $3
  • Painters tape (we already had this)
  • Two cans of spray paint - $14
    • We used Rust-Oleum Spray Paint Metallic in Pure Gold and Satin Bronze. Below is an Amazon affiliate link to the Pure Gold. We purchased the Satin Bronze at Home Depot.

We spent under $40 to make two large pieces of art (we already had the painters tape). I think that's a great deal! We also have almost the whole sample paint left and a lot of the pure gold spray paint.

DIY Canvas Arrow Art

I made Scott write down the steps so I could share them with you. :)

DIY Canvas Arrow Art

1. Buy a blank canvas

  • We purchased ours at Hobby Lobby while they were 50% off
  • We used two 24" X 36" canvases

2. Paint the entire canvas the background color of your choosing

  • We used a small paint sample container (8 fl oz) and had plenty of paint and still have a lot left over
  • Ours is BEHR ULTRA eggshell enamel interior color sample in Almond Milk
DIY Arrow Art

3. Once the canvas is dry, determine how thick you want your arrows to be (the portion you will paint with spray paint).  We decided on 8" thick arrows.  

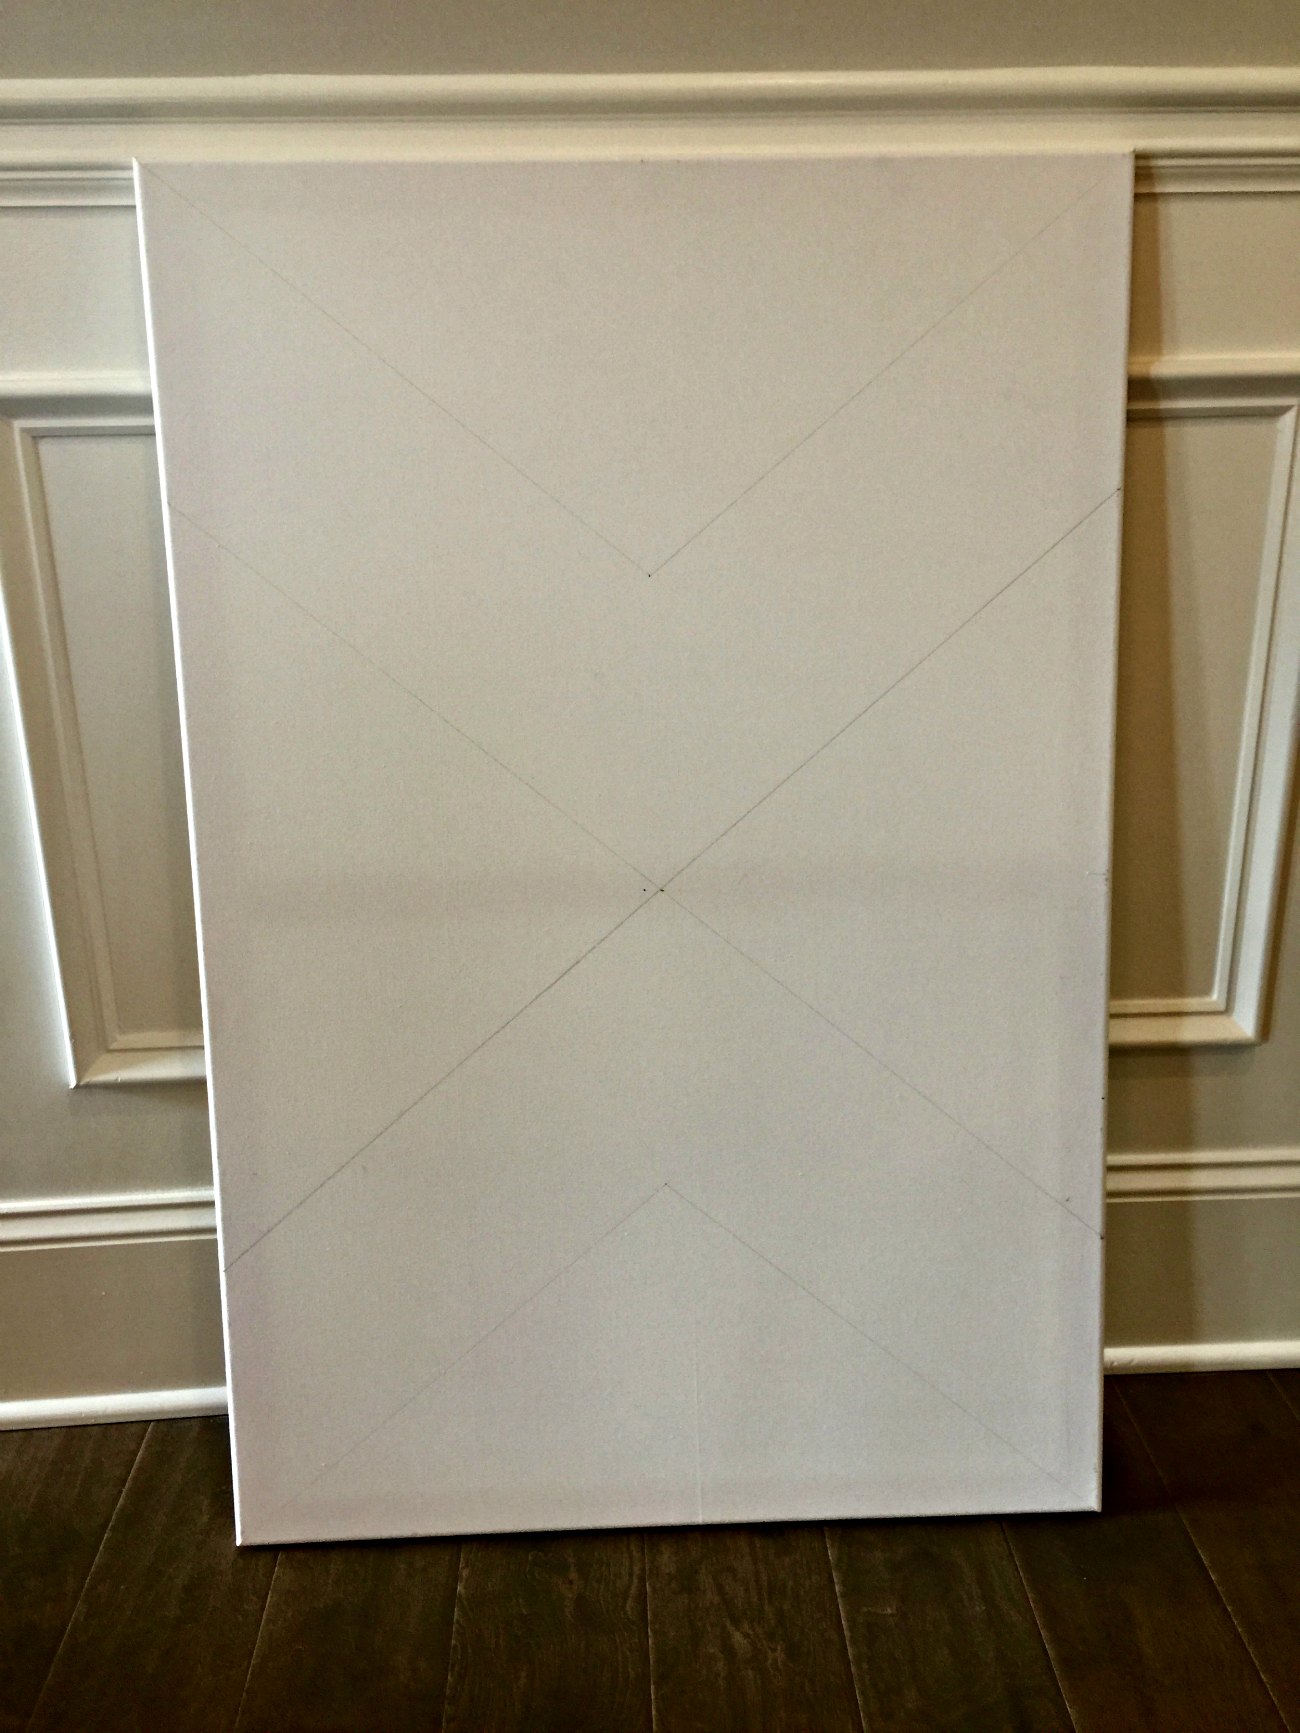
  • Now that you know how thick you want your arrows, the first step before drawing out the arrow is to find the exact midpoint of the canvas and premark that intersection with a pencil (it probably helps to make a small X).
  • Then, measure 8" vertically up and down from your midpoint and mark each with another X. This will mark the inner border of your arrows and you will need to make sure both x's are at the exact horizontal midpoint of the canvas, so measure from each edge to ensure your arrows will be parallel. 
  • You will then need to use a straight edge (we used a 36" level) to draw your arrows.  Start from each corner and draw a straight line to the X's you marked in the previous step.  Do not draw lines to the midpoint in this step...that is next.
  • Now, you will need to draw the outer borders of your arrows.  Measure 8" (or whatever width you decided on in step #1) from each corner and draw a straight line to the midpoint all the way across to the other side of the canvas.  Measure the border's endpoint on the other side of the canvas to the corner which you've drawn your border to in order to make sure your width is consistent throughout.
  • Repeat for outer border from other corners of the canvas.
DIY Arrow Art

4. Carefully tape along the lines and place newspaper underneath the tape to cover the section of the canvas that will not be painted with spray paint.  The midpoints are tricky because they do not form perfect 90-degree angles, so you'll need to cut small pieces of tape (about 1/2" long) and place them along the midpoints of the arrows.  We had to fold down the first piece of tape to the midpoint then place the second small piece of tape on top to make a perfect point.  This step is tough, but take your time to get it right!

5. Now it's time to actually paint the arrows! We used mainly the metallic satin bronze but also used the pure gold just to give it some extra texture. You could just use one color if you prefer but we love the way the light hits it and shows off the pure gold.

DIY Arrow Art

5. Remove the tape while the paint is still drying

6. Once dry, hang your artwork and admire your hardwork. :)

DIY Arrow Art

Life is Short Make it Count. #21

PersonalWhitney CarlsonComment
Awesome '80s Run 5k

We're having hiking withdrawals. We haven't been hiking since August 5th when we went to the Smokies! I've been trail running with friends a few times but it's still not the same. We probably won't be able to go this upcoming weekend either because the weather looks terrible but that could always change. We do leave for our two-week hiking trip next Friday but we're still looking to squeeze in a hike or two here before we leave.

On Sunday (August 20th) we were going to travel to North Carolina to my uncle's house and I was going to stay the night to watch the eclipse but we decided to not go and deal with traffic. Neither one of us were in the mood and I'm glad we didn't go! Traffic was a nightmare in North Georgia and we had a pretty good viewpoint from where we live. Although it wasn't totality, I had fun with my neighbors and Scott was able to see it at work.

Be sure to follow us on the following social media accounts (and snapchat under hesheeatclean) and also sign up for our newsletter so you never miss anything!

Workouts

On August 19th I ran a 5K with some of my neighbor-friends. I didn't decide to run it until the morning of because I wasn't sure if we were going out of town or not. It was an 80s themed race. We did the best we could with our outfits with it being last minute but they were not as 80s as they could have been! I had a pony/unicorn thing on my socks with rainbow hair that tickled me when I ran. I also didn't make the best decision to wear capris in August in Georgia. Oh well. I did it and I finished first in my age group! Actually, everyone in our group placed. It was a blast! I was proud of myself and everyone else too!

Other than the race, I'm still going to boot camp and walking with my friends. Sometimes we run but we at least walk daily. I went to the gym with Scott last Saturday and really enjoyed lifting weights like I normally do. I like boot camp but I can't wait to get back in and start lifting heavy again. When we get back from our trip I'm going to start the She Sweats 12-Week Transformation which will take me basically into the new year!

Awesome '80s Run 5k

Home Updates

We had our new shadow boxes/chair railing painted and had the living room painted an accent color. While the painters were here I decided to also have them paint under our island and the inside of our front door. We are in love! As you can see, our design is just kind of all over the place but we love it. The pictures from our travels are basically all over our walls and it just took on an outdoor adventure type theme. It fits us perfectly!

Living Room in Sherwin Williams Gauntlet Gray
Kitchen Island Painted in Sherwin Williams Gauntlet Gray

The inside of the front door being painted is literally my favorite thing ever. I never knew that I would love painting a door so much! You can see that Rambo and Lucky love it too!

I posted these pictures on Instagram Stories and a few people asked me about the colors. The main wall color is Agreeable Gray by Sherwin Williams and the dark gray we had painted is Gauntlet Gray also by Sherwin Williams.

Front Door in Sherwin Williams Gauntlet Gray

This past weekend we finally make some of the art that I've been eyeing for months! The wall next to our fireplace needed something on it. We couldn't really ever agree on anything but once I saw a picture on Pinterest I knew that we had to have it! Plus, I've been wanting to paint something and do some of the artwork ourselves. It looks great with the new dark gray walls and hides the switch for the fireplace. I'll do a tutorial on it soon!

Living Room in Sherwin Williams Gauntlet Gray

These updates are getting longer and longer because I've been slacking on sharing them! But I have one more update and it's a yummy one! Honestly, I don't follow or watch boxing, I don't like to see people get hit or hurt. However, we went over to our neighbors to watch the fight on Saturday night. A lot of the 'hood came over and we had a great time! We took over pistachios and finally made brownies with the mix that Now Foods sent over a few months ago.

Disclaimer: NOW Foods sent us the mix for free to try out!

I didn't tell anyone they were "healthy" because I wanted to see what the reaction would be. Everyone who tried one loved them! They were all gone, with many people eating multiple. I was waiting for the right time to try them because I knew if I made them for just me and Scott that we would eat them all ourselves and I definitely didn't want to do that. I'm glad they were put to good use and lots of our neighbors are now Now Foods Organic Chocolate Fudge Brownie Mix Fans! All you have to do is add an egg, hot water, and oil (we used olive oil). It contains no artificial colors, flavors, sweeteners or hydrogenated oils. It is also made without the 8 major common allergens!

You can buy the brownie mix here and try for yourself!
Now Foods Organic Chocolate Fudge Brownie Mix

DIY Industrial Pipe Shelving

PersonalWhitney Carlson1 Comment
DIY Industrial Pipe Shelving

As many of you know we moved in April. Well, we actually moved in March too. ;-) Our house sold very quickly and at the time we weren't even really sure if we were staying in Georgia or moving to Montana. We ended up living with family for five weeks in between our last house and our new house. We lived in our last house for almost ten years and I wasn't really sure what type of decorating I wanted for our new house. I came across this industrial pipe shelving and fell in love. It has sort of a farmhouse feel but definitely more industrial so it fits perfect for us. I'll share more of our house eventually but I wanted to go ahead and give a tutorial on how we did this shelving.

I read quite a few blogs on this, each with their own twist. I follow the Cherished Bliss blog the most (here is a link to her post) and we made a few changes.

Materials Needed for TWO Shelves (as pictured):

  • The following can be found in the plumbing section:
    • (4) 3/4″ Black Iron Pipe (10″ length)
    • (4) 3/4″ Pipe Cap
    • (4) 3/4″ Flange
  • 2 X 10 cut to desired length (we had ours cut into 4 shelves)
  • Rust-Oleum's Metallic Spray Paint (we used Oil Rubbed Bronze Metallic)
  • Wood Stain (in your desired color, we used Varathane Wood Stain in Kona)
  • Wall Anchors and Screws

Be prepared to spend a little bit of money on this as the plumbing materials are not cheap. Below is what we spent, at Home Depot, for two shelves (as pictured):

Total for paint materials: $11.24
* Don't forget the brush for the stain if you don't already have one!

  • $7.64 | 2 X 10
  • $23.80 | (4) 3/4″ Black Iron Pipe (10″ length)
  • $8.40 | (4) 3/4″ Pipe Cap
  • $23.40 | (4) 3/4″ Flange

Total for shelf materials: $63.24

Since we did two in our master bathroom and two in the guest bathroom we spent a total of $126.48. We think that the shelves are totally worth it! We love them! Since we built the shelves we've had someone come in and "frame" our bathroom mirrors and they used the same stain.

DIY Industrial Pipe Shelving

Directions:

Prepping the Shelves:

  1. Remove the stickers from the plumbing supplies (we used Goo Gone to help remove the residue).
  2. In an open space, find cardboard or styrofoam to lay out all of the items you need to paint. Apply a coat of spray paint and allow to dry. Once dry, flip over and apply a coat to the remaining side. Allow to dry.
  3. While the spray paint is drying, stain your wood shelves. Allow one side to dry and then flip over to stain the other side.
  4. Once everything is completely dry (we waited until the next day) you can start to assemble your shelves.
DIY Industrial Pipe Shelving

Assembling the Shelves:

  1. If you haven't already, hand screw the pipe cap onto the iron pipe.
  2. Determine where you want to hang your shelf. Once measured, use an anchor in the wall. Using a drill, screw the flange onto the wall. Hand screw the iron pipe into the flange. Repeat for all 4 iron pipes.
  3. If you used silver screws like we did, you can take some of the same spray paint and use it to paint the screws the same color (you could also do this when you are spraying the other items but we didn't!). I sprayed a little bit of spray paint into a cup and used a q-tip to paint the heads of the screws.
  4. Once all of your shelf holders are secure into the wall you can add your shelves!
  5. Now comes the fun part, decorate your shelves with whatever you choose! We have one shelf in our master bathroom and one in the guest bathroom so we've used the following:
    1. Fake plants
    2. Towels
    3. Cotton Balls
    4. White Bars of Soap

*** If you have children and you are worried about them toppling over the shelves you would have to explore ways to attach the wood to the iron pipe. As they are pictured and as this tutorial shows, the wooden shelf just sits on top of the iron pipe. We haven't had any problems but we also don't have any kids. :)

DIY Industrial Pipe Shelving

* This post may contain affiliate links. Clicking or purchasing something through these links does not cost you any extra. We may receive a small commission which helps us keep the recipes, workouts, and educational information you love coming!