He & She Eat Clean | Healthy Recipes & Workout Plans

Turkey Trot Challenge

ChallengesWhitney CarlsonComment
Advanced Turkey Trot Challenge

WANT A FREE HIIT EBOOK?

Join our newsletter and get the instant download. We never spam you - we only bring you the best workouts and recipes each week! Click here to join now.

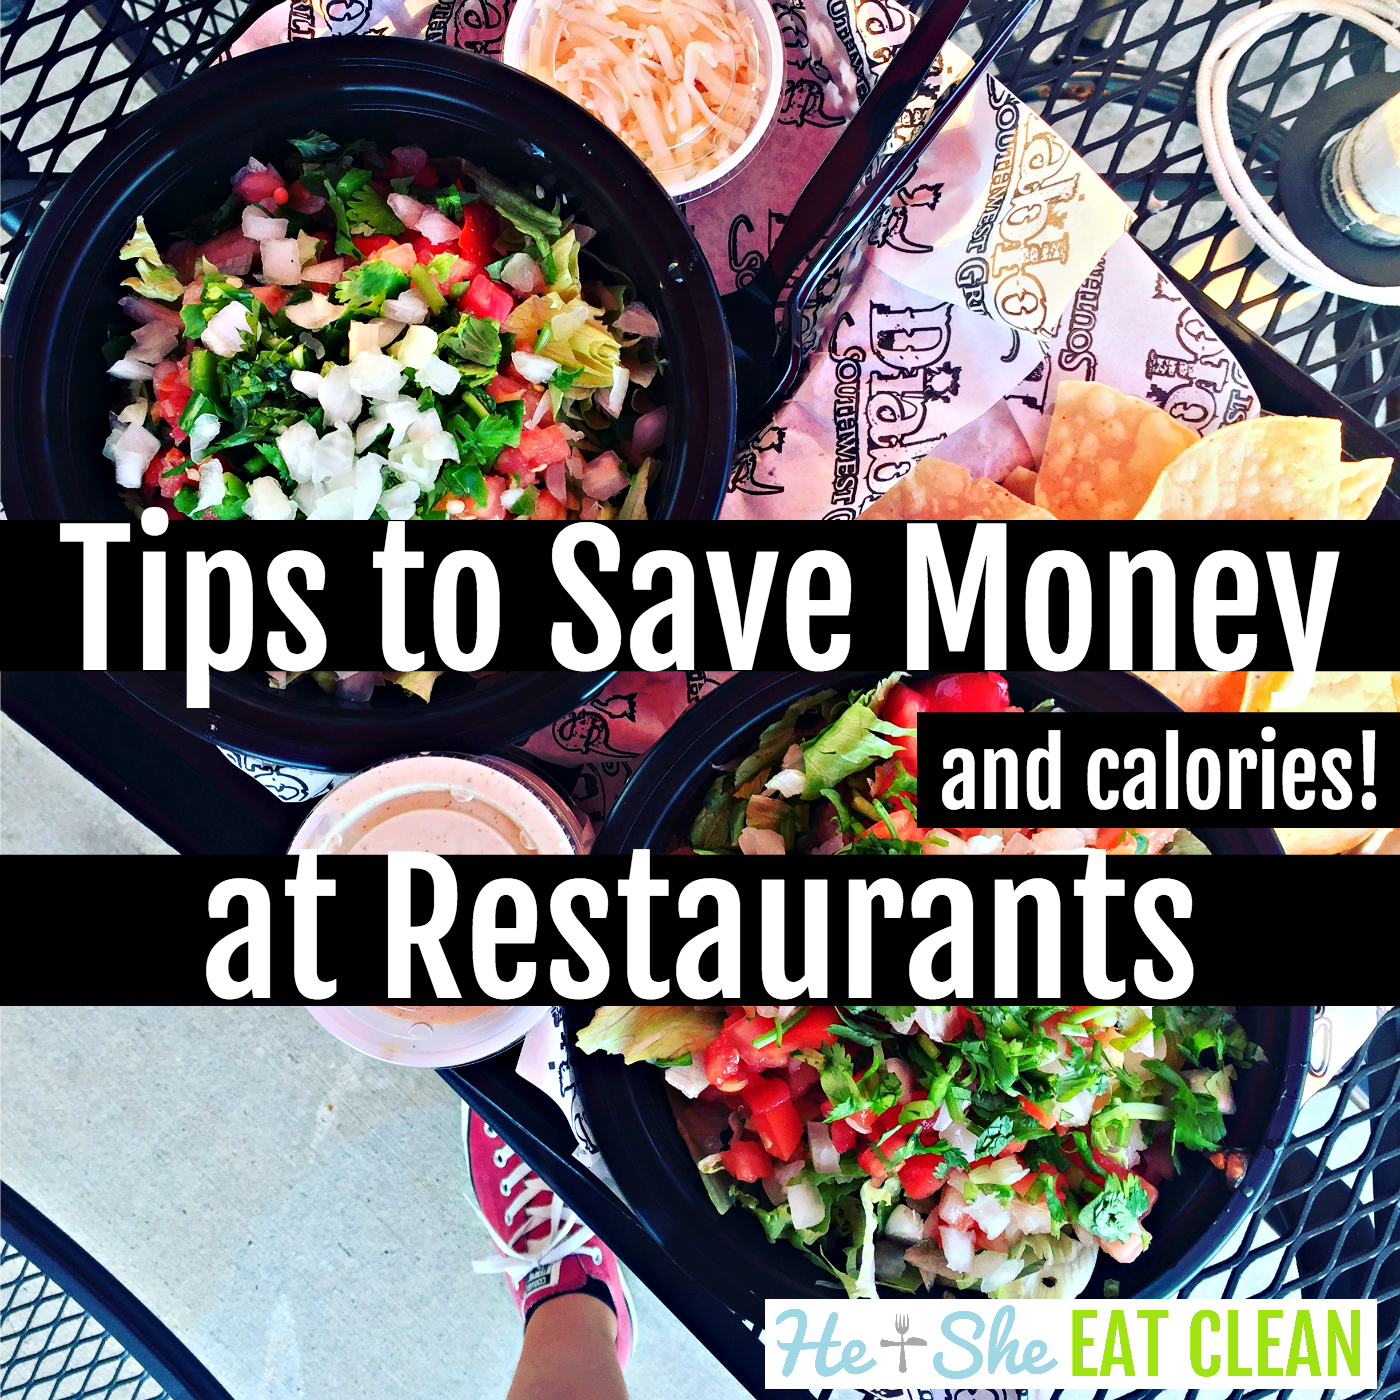
Note: We're on Snapchat! You can find us under hesheeatclean. We will be posting more of our meals, workouts, and money saving tips! Also, follow us on InstagramFacebookPinterest, and Twitter!


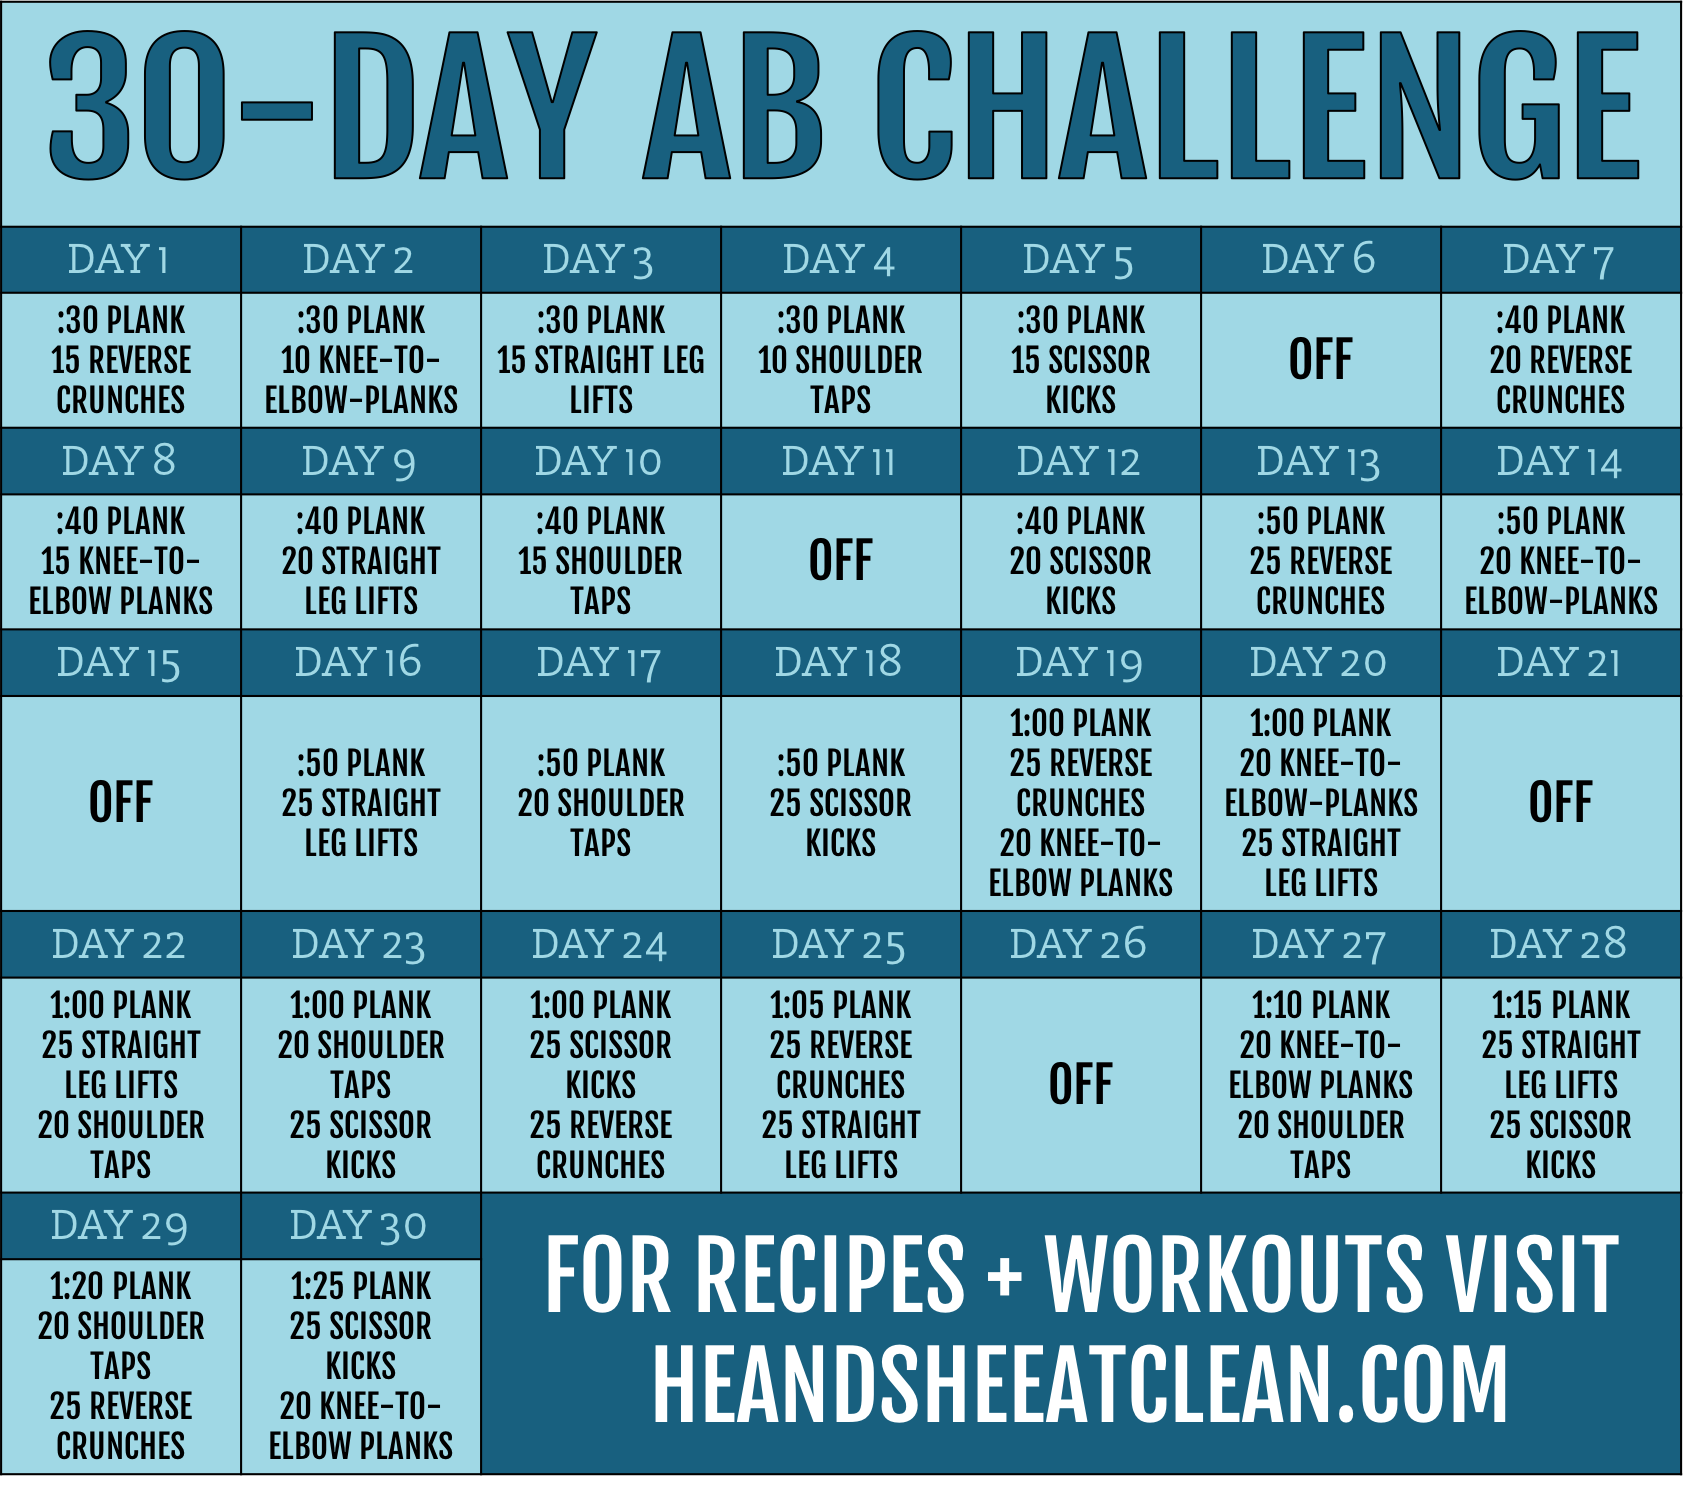
Seriously, how is it already almost NOVEMBER?!?! We can't turn back time so we might as well embrace the fact that we only have two more months left in 2017. The challenge this month is geared towards working on your cardio endurance. We've released another version of the 30-Day Turkey Trot Challenge that is more of a beginner challenge. If that is more your style, check it out here. This one is geared towards those who are more advanced.

This challenge was designed to be something that you do in addition to your normal workout (which is hopefully one of our workout plans!). We have 4, 6, and 12-week workout plans for all fitness levels! Don't let this be your only workout, cardio is only part of the equation...weight lifting is very important also!

Stay updated on all of our current fitness challenges here. Tag us on Instagram and use the hashtag #heandsheeatclean so we can follow along!

Any of this can be done on the treadmill but I always prefer to be outside when it's nice. I would encourage you to do as much as possible outside. There's just something different about doing cardio when you are in the nice, fresh air.

Sprint Training: This will make you faster. You choose your split. I like to do 30 seconds of sprinting and then walk for 30 seconds or 20 seconds of sprinting and then walk for 40 seconds (just depending on how fast your sprints really are)! If you are on the treadmill you can just put your legs on the side for the walk portion and completely rest during that time. When it's time to spring again just hop back on.

Hill Training: This will make you a stronger runner. Find a nearby hill and sprint up the hill! You can either jog back down or walk back down and do it all over again. If you are on the treadmill, set your incline high (most treadmills go to 15% but choose something that you are comfortable with but that also pushes you!) and do your splits just like you would for the running sprints.

Advanced Turkey Trot Challenge

6 Ways to Save Money at Restaurants

MoneyWhitney Carlson2 Comments
Tips to Save Money (and Calories!) at Restaurants

The easiest way to save money on food is to skip restaurants altogether and make your own food but we know many people like to go out so we are going to share some of our favorite money saving tips with you! Not only will limiting your dining out help your wallet but it will also help your waistline. You are in complete control of what goes into your food and how much you eat. We try to limit our eating out to once or twice a week but you can use these tips no matter how often you dine out. Some of these tips seem obvious but are often overlooked.

>>>>> The Ultimate List of Ways to Save: 18 Ways to Save $15,000 in 2018!

Ways to Save Money (and Calories!) at Restaurants

  • Choose an inexpensive restaurant
    • We don’t promote "fast food" but places like Moe’s, Chipotle, and other similar restaurants are surprisingly affordable and typically have healthier options!
    • Calorie Saving Tip: Ask for the extras (like cheese, guac, etc.) on the side so you can control how much you consume.
  • Go for lunch
    • Most restaurants are open for lunch or early dinners. Many of them have lunch menus that are similar to their dinner menus but less expensive!
    • Calorie Saving Tip: Just eating out for lunch instead of dinner is a calorie saver because the portions are usually slightly smaller!
  • Skip the soft drinks
    • Even though $2-$3 per drink doesn't sound very expensive it quickly adds up over time and water is free at every restaurant I've been to.
    • Calorie Saving Tip: Water has zero calories and the calories from those "free refill" soft drinks can quickly add up, just like the cost does.
  • Skip the alcohol
    • Alcoholic beverages are very expensive when dining out. The cheapest I've seen is $6 per drink. If there's two of you there and you both have two drinks, that's $24 JUST on drinks! Talk about adding up quickly! If you need to drink, drink at home.
    • Calorie Saving Tip: Again, water has zero calories and typically doesn't lead to eating other random things because you are drinking.
  • Skip the appetizers
    • Eat something small before you go to dinner if you are already starving! Appetizers are at least $8 and full of calories...see below.
    • Calories Saving Tip: Appetizers are loaded with calories, most are fried and just make you even more hungry. If you are at a restaurant that automatically gives you bread or chips, ask them not to or limit yourself to one slice, a few chips, etc.
  • Skip the desserts
    • See above point on appetizers...
    • If you must have dessert, limit it to once a week and buy it from the grocery store. It’s much less expensive to go to the grocery store and buy ice cream (or make your own using frozen banana and peanut butter!) than it is to buy dessert at restaurants. We also have a lot of healthy dessert recipes that you can try (four-ingredient peanut butter balls and cookie dough are two of our most popular)!

Below are some examples and how much is spent. Keep in mind that this is for just ONE time eating out. Many families eat out multiple times per week resulting in $800+ spent on dining out in a month.

  • If a party of two gets an appetizer ($8), one alcoholic drink each ($6 each, minimum), entrees ($15 each, minimum), and a dessert ($8) that's a total of $58 plus tip.
  • If a part of four (two parents and two kids) gets an appetizer ($8), four soft drinks ($3 each), entrees ($15 each adult, $8 each child), and dessert ($8) that's $74.

Although we are fully aware that many people like to dine out and act carefree at least once a week, it's not the best idea when you are trying to save money and/or pay off debt. The hard truth is that sometimes you have to say "no". Life is about balance. That requires saying "no" more than "yes" when you have goals! As mentioned, Scott and I try to keep our dining out to once or twice a week and usually spend less than $20. Sometimes, when we are traveling or really busy, we do dine out more often but we always follow these tips and try to limit our spending as much as possible.

DIY Canvas Arrow Art

Whitney CarlsonComment
DIY Arrow Art

We had a blank wall in our small living room that we weren't quite sure what to do with. I didn't want the wall to be too busy since we already have a lot of artwork in this open area but the wall definitely needed something! I saw a few ideas on Pinterest that I liked and we decided to go with this arrow art since it fits in with our adventure/travel theme that has taken over our whole house. ;-) We gained inspiration from this design and this design. We basically just saw the pictures on Pinterest and got to work. A bonus is that the one on the left covers up the switch for the gas logs!

This was a very inexpensive way to fill the space and also gives us the satisfaction of saying "Yes, we made those!". The prep is the longest part but is also the most important. I would say set aside 4-6 hours for this project (if you are making two) just because of the drying time. You won't be working on them for straight 4-6 hours though.

RELATED: DIY Industrial Pipe Shelving

Supplies (this is what we used):

  • Blank canvas (2 - 24" X 36") - $20 (we purchased while they were half off at Hobby Lobby)
  • Color sample - $3
  • Painters tape (we already had this)
  • Two cans of spray paint - $14
    • We used Rust-Oleum Spray Paint Metallic in Pure Gold and Satin Bronze. Below is an Amazon affiliate link to the Pure Gold. We purchased the Satin Bronze at Home Depot.

We spent under $40 to make two large pieces of art (we already had the painters tape). I think that's a great deal! We also have almost the whole sample paint left and a lot of the pure gold spray paint.

DIY Canvas Arrow Art

I made Scott write down the steps so I could share them with you. :)

DIY Canvas Arrow Art

1. Buy a blank canvas

  • We purchased ours at Hobby Lobby while they were 50% off
  • We used two 24" X 36" canvases

2. Paint the entire canvas the background color of your choosing

  • We used a small paint sample container (8 fl oz) and had plenty of paint and still have a lot left over
  • Ours is BEHR ULTRA eggshell enamel interior color sample in Almond Milk
DIY Arrow Art

3. Once the canvas is dry, determine how thick you want your arrows to be (the portion you will paint with spray paint).  We decided on 8" thick arrows.  

  • Now that you know how thick you want your arrows, the first step before drawing out the arrow is to find the exact midpoint of the canvas and premark that intersection with a pencil (it probably helps to make a small X).
  • Then, measure 8" vertically up and down from your midpoint and mark each with another X. This will mark the inner border of your arrows and you will need to make sure both x's are at the exact horizontal midpoint of the canvas, so measure from each edge to ensure your arrows will be parallel. 
  • You will then need to use a straight edge (we used a 36" level) to draw your arrows.  Start from each corner and draw a straight line to the X's you marked in the previous step.  Do not draw lines to the midpoint in this step...that is next.
  • Now, you will need to draw the outer borders of your arrows.  Measure 8" (or whatever width you decided on in step #1) from each corner and draw a straight line to the midpoint all the way across to the other side of the canvas.  Measure the border's endpoint on the other side of the canvas to the corner which you've drawn your border to in order to make sure your width is consistent throughout.
  • Repeat for outer border from other corners of the canvas.
DIY Arrow Art

4. Carefully tape along the lines and place newspaper underneath the tape to cover the section of the canvas that will not be painted with spray paint.  The midpoints are tricky because they do not form perfect 90-degree angles, so you'll need to cut small pieces of tape (about 1/2" long) and place them along the midpoints of the arrows.  We had to fold down the first piece of tape to the midpoint then place the second small piece of tape on top to make a perfect point.  This step is tough, but take your time to get it right!

5. Now it's time to actually paint the arrows! We used mainly the metallic satin bronze but also used the pure gold just to give it some extra texture. You could just use one color if you prefer but we love the way the light hits it and shows off the pure gold.

DIY Arrow Art

5. Remove the tape while the paint is still drying

6. Once dry, hang your artwork and admire your hardwork. :)

DIY Arrow Art