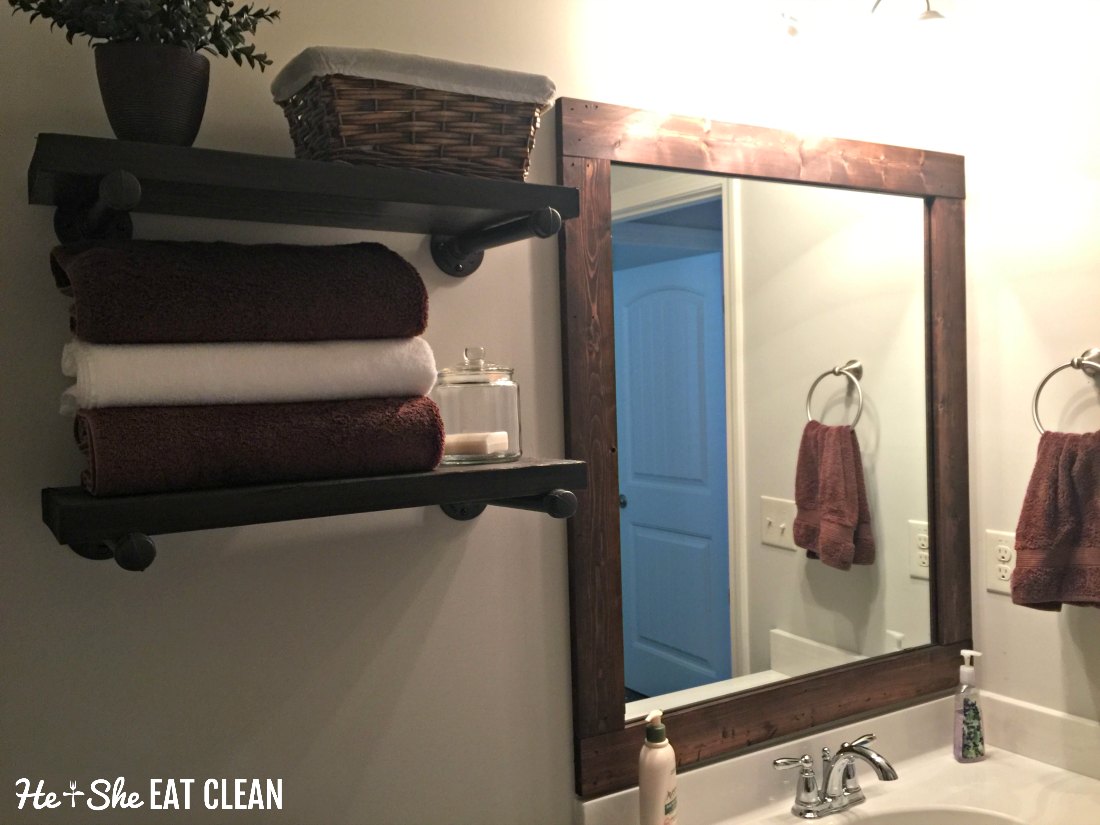
As many of you know we moved in April. Well, we actually moved in March too. ;-) Our house sold very quickly and at the time we weren't even really sure if we were staying in Georgia or moving to Montana. We ended up living with family for five weeks in between our last house and our new house. We lived in our last house for almost ten years and I wasn't really sure what type of decorating I wanted for our new house. I came across this industrial pipe shelving and fell in love. It has sort of a farmhouse feel but definitely more industrial so it fits perfect for us. I'll share more of our house eventually but I wanted to go ahead and give a tutorial on how we did this shelving.
I read quite a few blogs on this, each with their own twist. I follow the Cherished Bliss blog the most (here is a link to her post) and we made a few changes.
Materials Needed for TWO Shelves (as pictured):
- The following can be found in the plumbing section:
- (4) 3/4″ Black Iron Pipe (10″ length)
- (4) 3/4″ Pipe Cap
- (4) 3/4″ Flange
- 2 X 10 cut to desired length (we had ours cut into 4 shelves)
- Rust-Oleum's Metallic Spray Paint (we used Oil Rubbed Bronze Metallic)
- Wood Stain (in your desired color, we used Varathane Wood Stain in Kona)
- Wall Anchors and Screws
Be prepared to spend a little bit of money on this as the plumbing materials are not cheap. Below is what we spent, at Home Depot, for two shelves (as pictured):
- $5.98 | Rust-Oleum's Metallic Spray Paint (Oil Rubbed Bronze Metallic)
- $5.26 | Varathane Wood Stain (half pint in Kona)
Total for paint materials: $11.24
* Don't forget the brush for the stain if you don't already have one!
- $7.64 | 2 X 10
- $23.80 | (4) 3/4″ Black Iron Pipe (10″ length)
- $8.40 | (4) 3/4″ Pipe Cap
- $23.40 | (4) 3/4″ Flange
Total for shelf materials: $63.24
Since we did two in our master bathroom and two in the guest bathroom we spent a total of $126.48. We think that the shelves are totally worth it! We love them! Since we built the shelves we've had someone come in and "frame" our bathroom mirrors and they used the same stain.
Directions:
Prepping the Shelves:
- Remove the stickers from the plumbing supplies (we used Goo Gone to help remove the residue).
- In an open space, find cardboard or styrofoam to lay out all of the items you need to paint. Apply a coat of spray paint and allow to dry. Once dry, flip over and apply a coat to the remaining side. Allow to dry.
- While the spray paint is drying, stain your wood shelves. Allow one side to dry and then flip over to stain the other side.
- Once everything is completely dry (we waited until the next day) you can start to assemble your shelves.
Assembling the Shelves:
- If you haven't already, hand screw the pipe cap onto the iron pipe.
- Determine where you want to hang your shelf. Once measured, use an anchor in the wall. Using a drill, screw the flange onto the wall. Hand screw the iron pipe into the flange. Repeat for all 4 iron pipes.
- If you used silver screws like we did, you can take some of the same spray paint and use it to paint the screws the same color (you could also do this when you are spraying the other items but we didn't!). I sprayed a little bit of spray paint into a cup and used a q-tip to paint the heads of the screws.
- Once all of your shelf holders are secure into the wall you can add your shelves!
- Now comes the fun part, decorate your shelves with whatever you choose! We have one shelf in our master bathroom and one in the guest bathroom so we've used the following:
- Fake plants
- Towels
- Cotton Balls
- White Bars of Soap
*** If you have children and you are worried about them toppling over the shelves you would have to explore ways to attach the wood to the iron pipe. As they are pictured and as this tutorial shows, the wooden shelf just sits on top of the iron pipe. We haven't had any problems but we also don't have any kids. :)
* This post may contain affiliate links. Clicking or purchasing something through these links does not cost you any extra. We may receive a small commission which helps us keep the recipes, workouts, and educational information you love coming!


![#ProgressIsPerfection [3 Simple Ideas to Reach Your Goals]](https://images.squarespace-cdn.com/content/v1/555c964fe4b07d15252a8927/1520969172984-7HDOHI6ZRM0PCZCZ7O67/progress-is-perfection-silk-he-and-she-eat-clean2.jpg)


